Before getting an NOI2024 gold medal, I had always wanted to set up a server at home, and after that, I started considering it seriously.
As a server at home, it’s important to consider size, noise, and power consumption, so traditional servers are not a suitable choice. Considering future needs like setting up local AI models, Minecraft Server, or even using it as a test machine, CPU and GPU performance are also very important.
After careful consideration, I took advantage of an educational discount to get an M2 Mac Mini, with 24GB of memory, upgraded to 10GbE, and a built-in 256GB SSD. I’ll expand it via Thunderbolt 4 later. The total cost was just over 7000 and included free AirPods (it was indeed a bit of a loss buying the M2 at this point, but if I didn’t hurry, I would be bored to death at home).
When it arrived, I realized it was a bit larger than I expected (I thought it would be only slightly bigger than the Apple TV).

Infrastructure
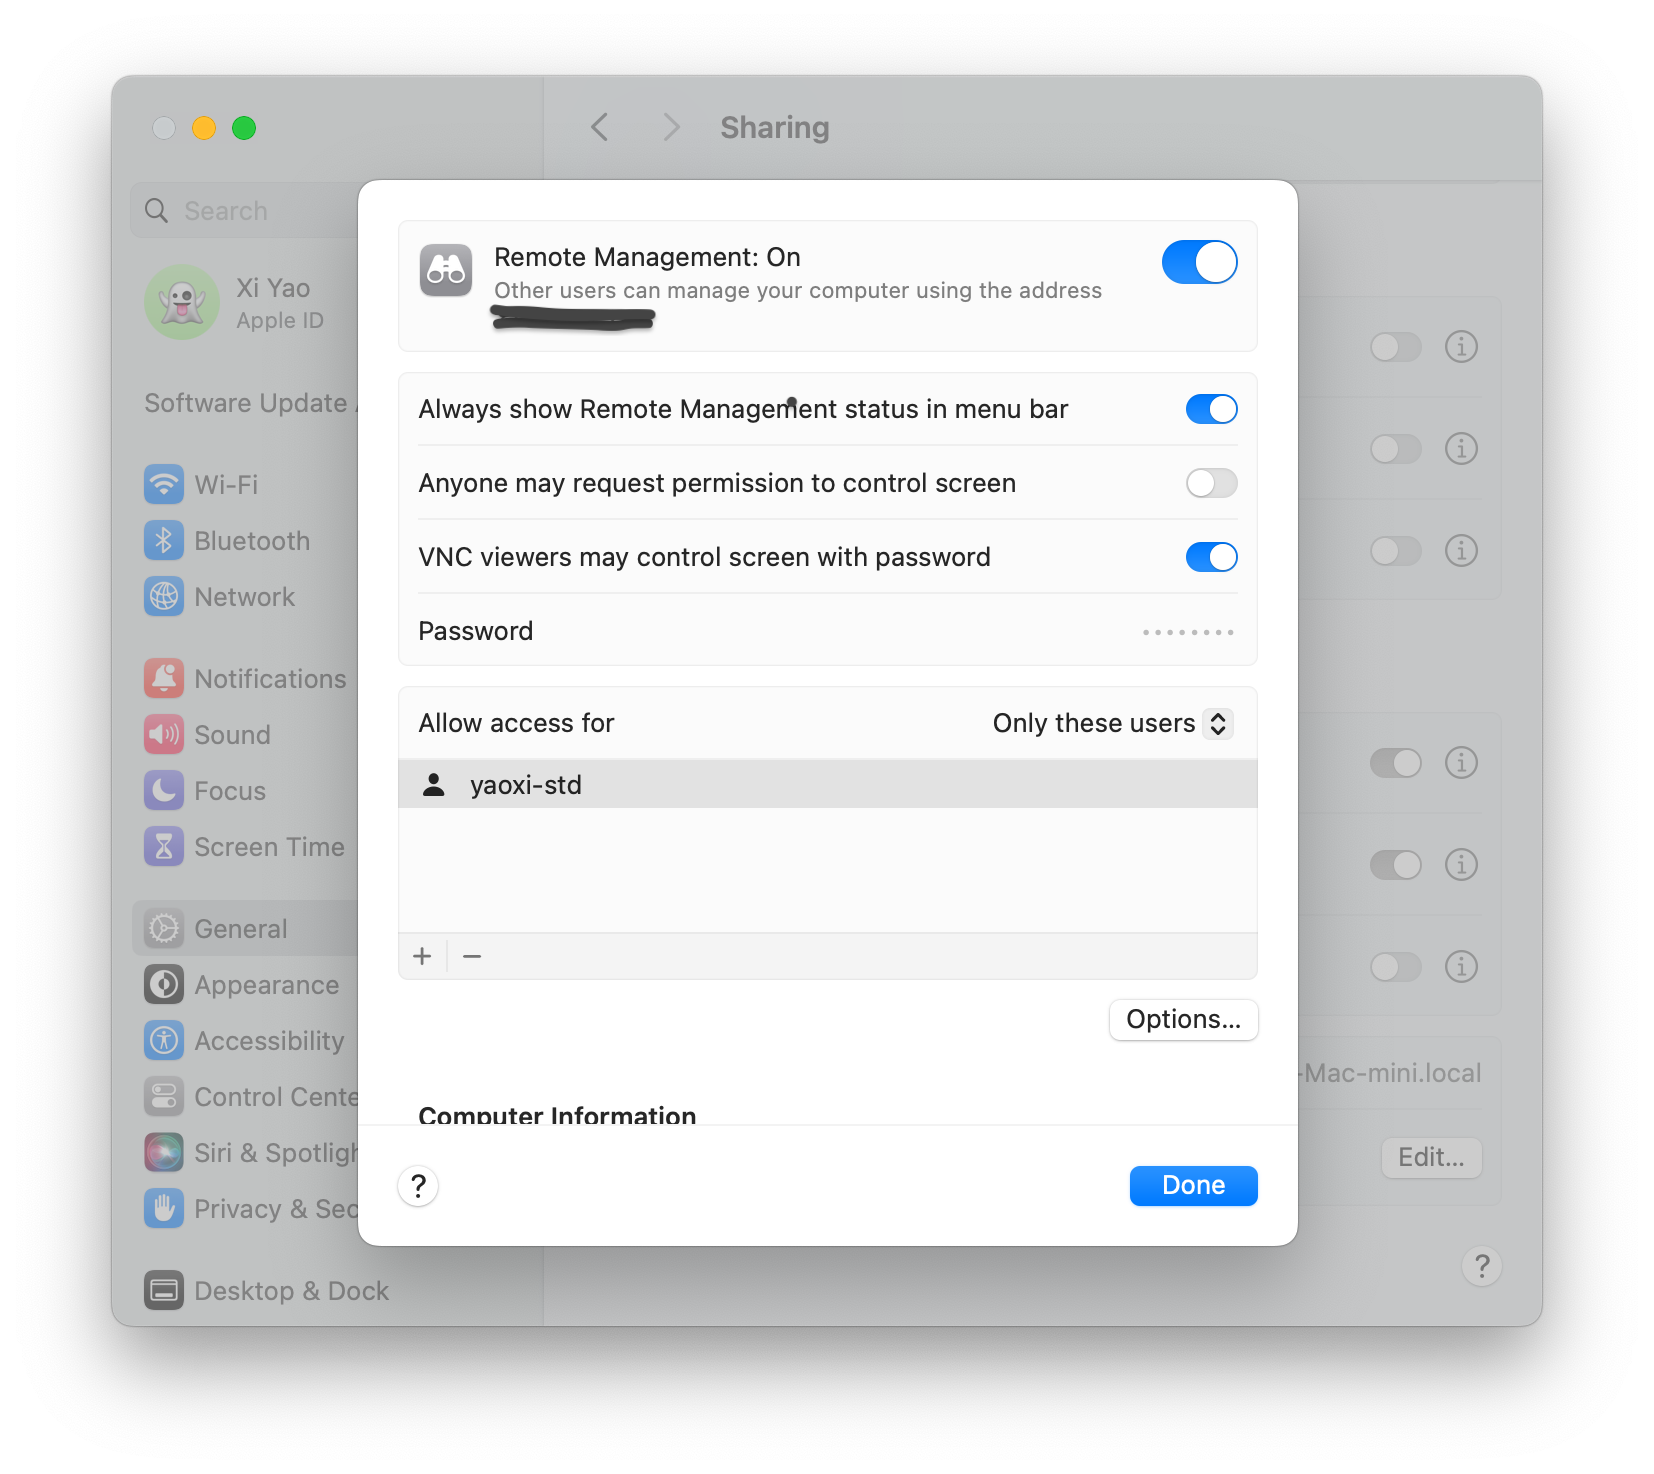
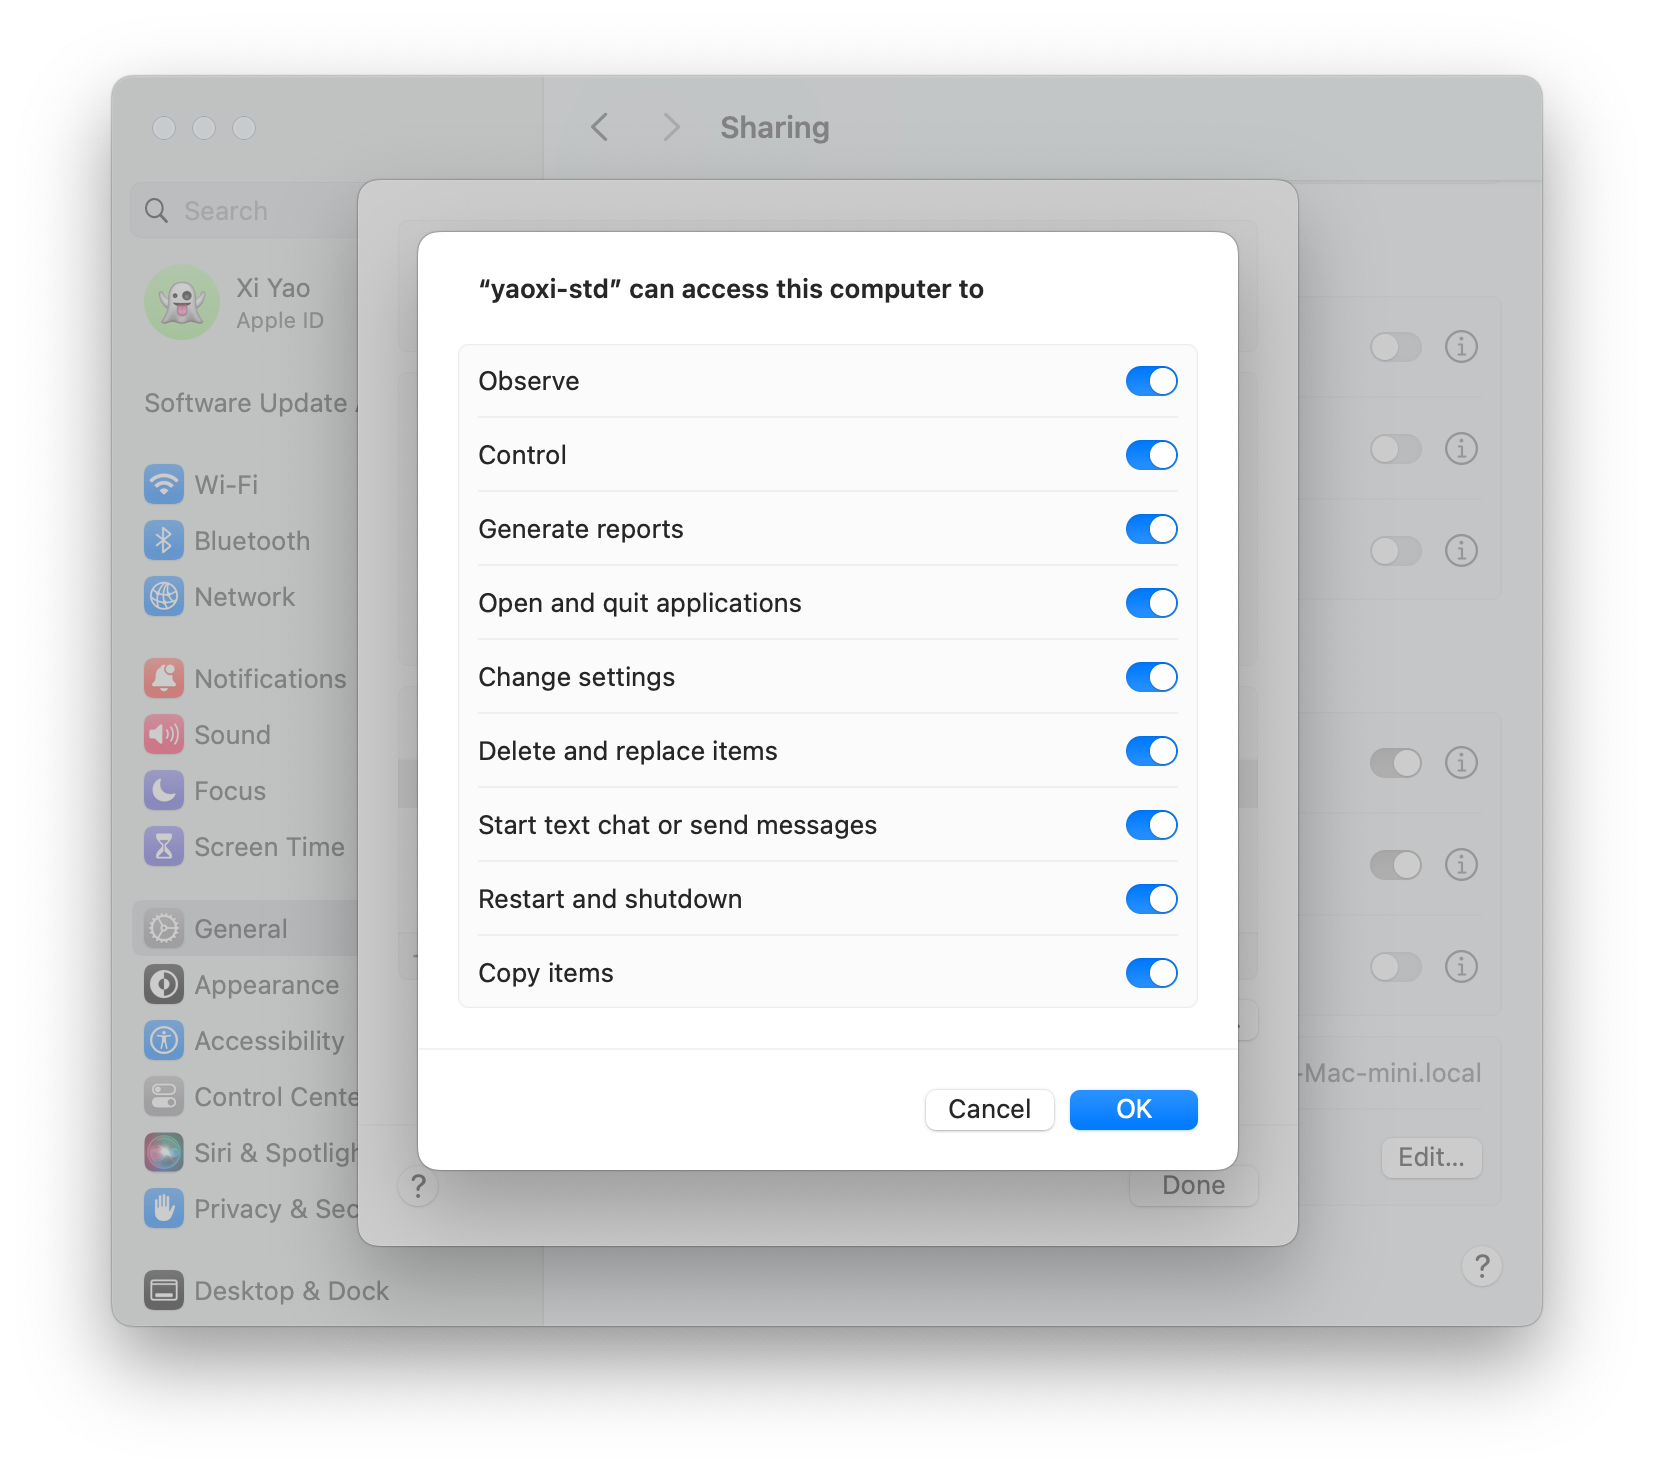
After receiving the Mac Mini, first connect it to a monitor using an HDMI cable for the initial setup. For macOS Sonoma, open System Settings, go to General > Sharing, enable Remote Management and Remote Login, click the info icon on the right, set the remote login password and allowed remote management users, and finally check all permissions in Options. It is recommended to set a strong password to prevent brute force attacks.

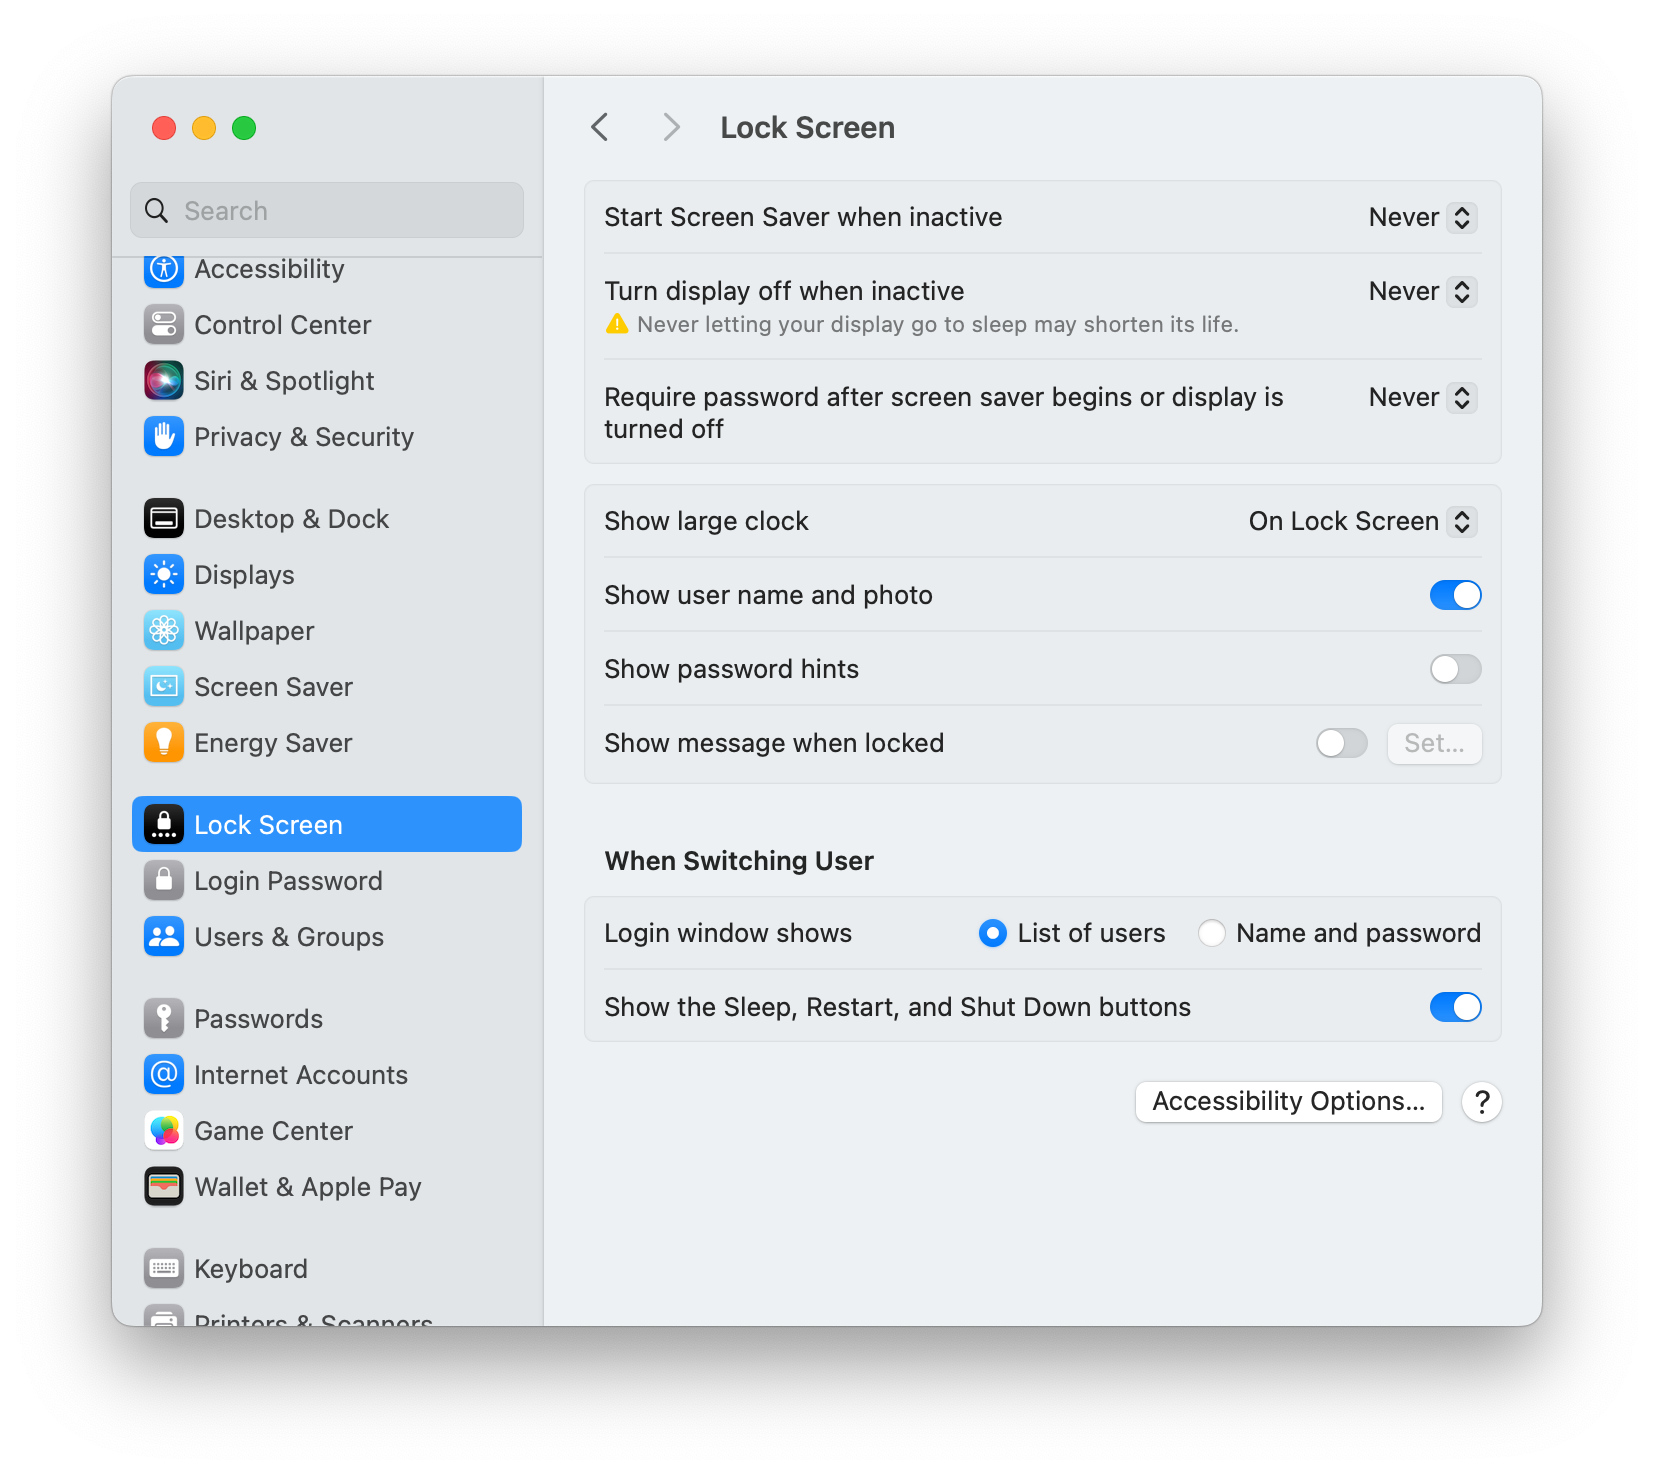
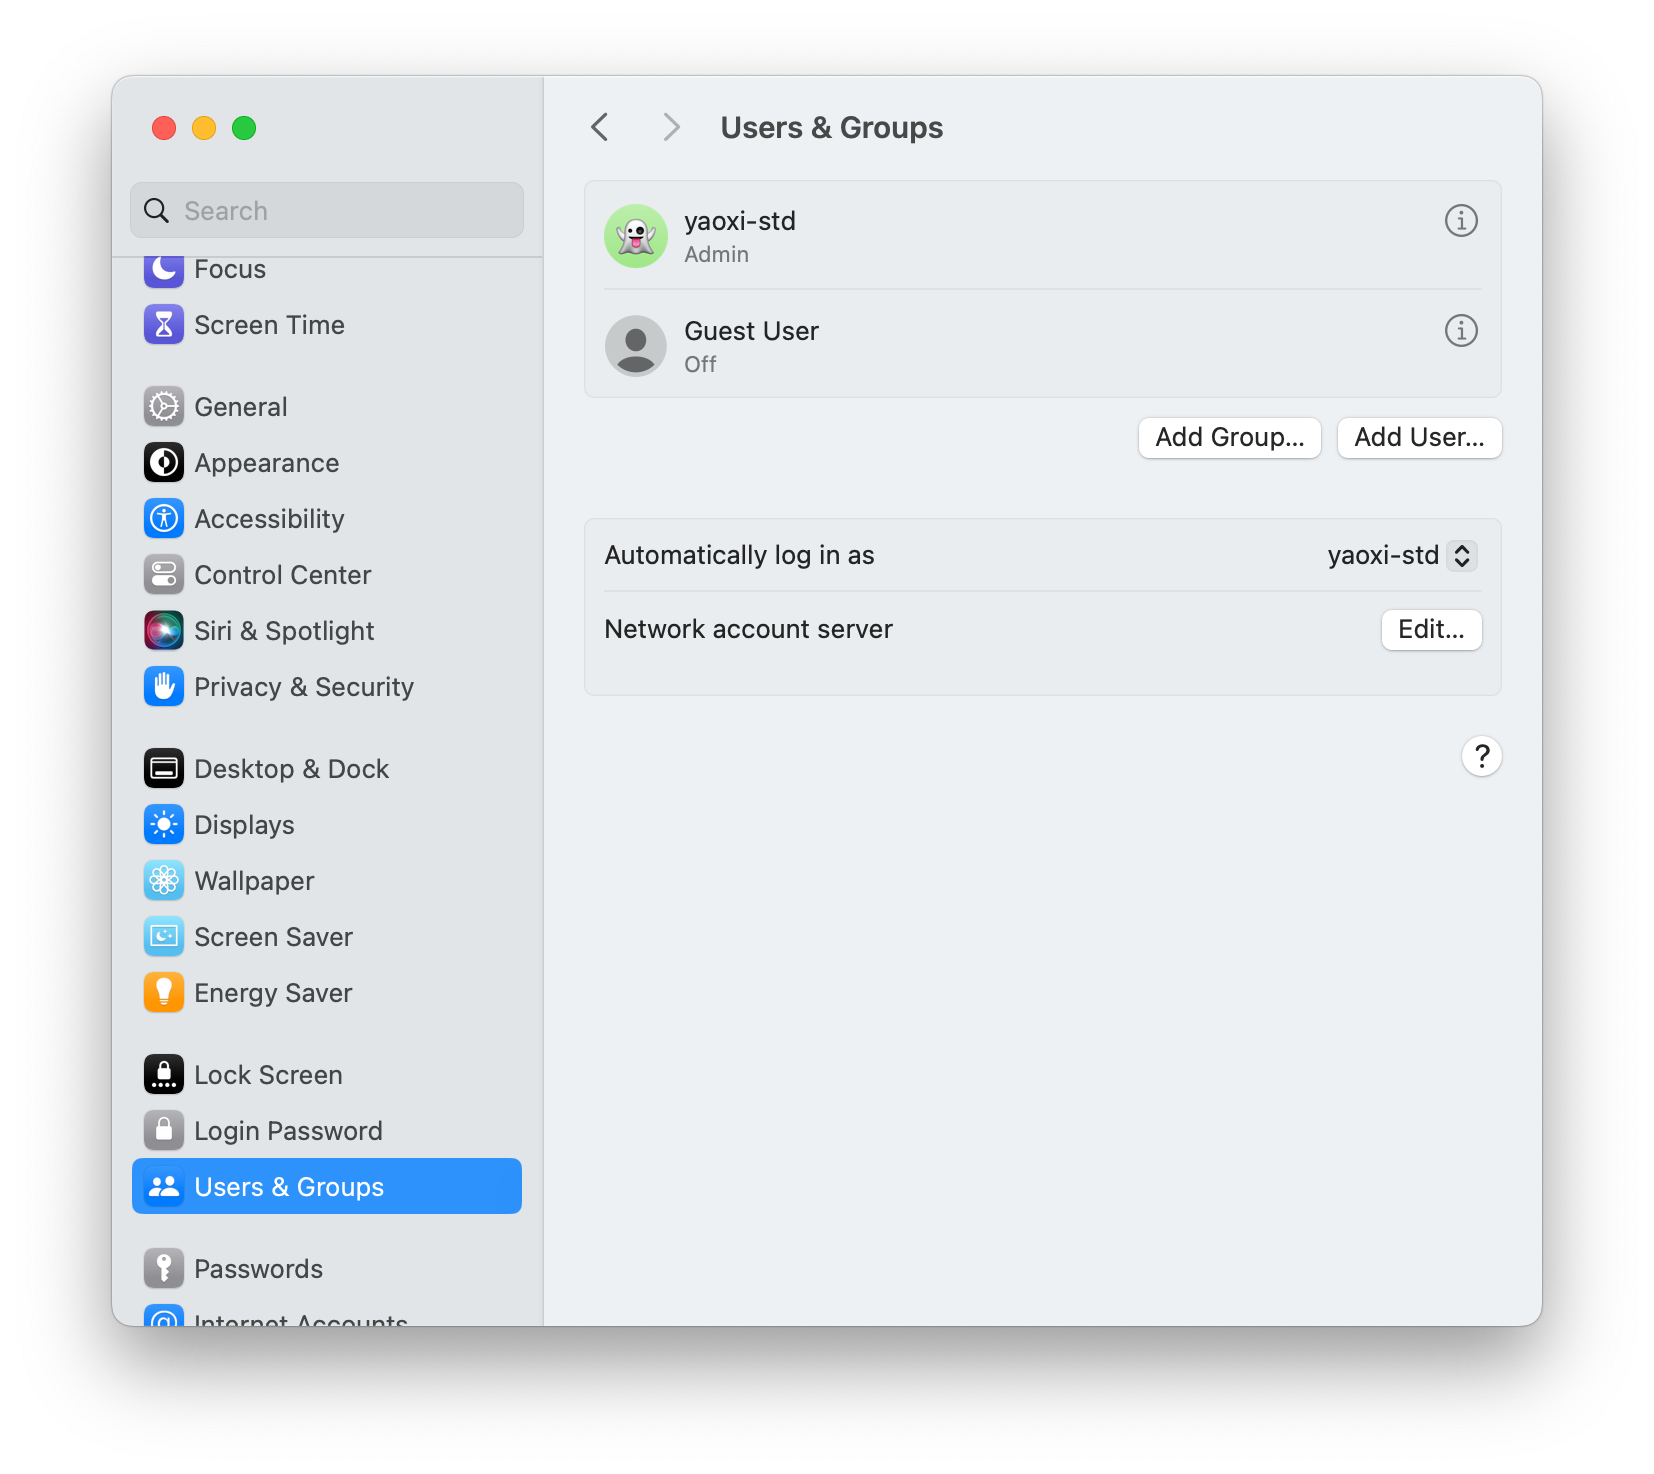
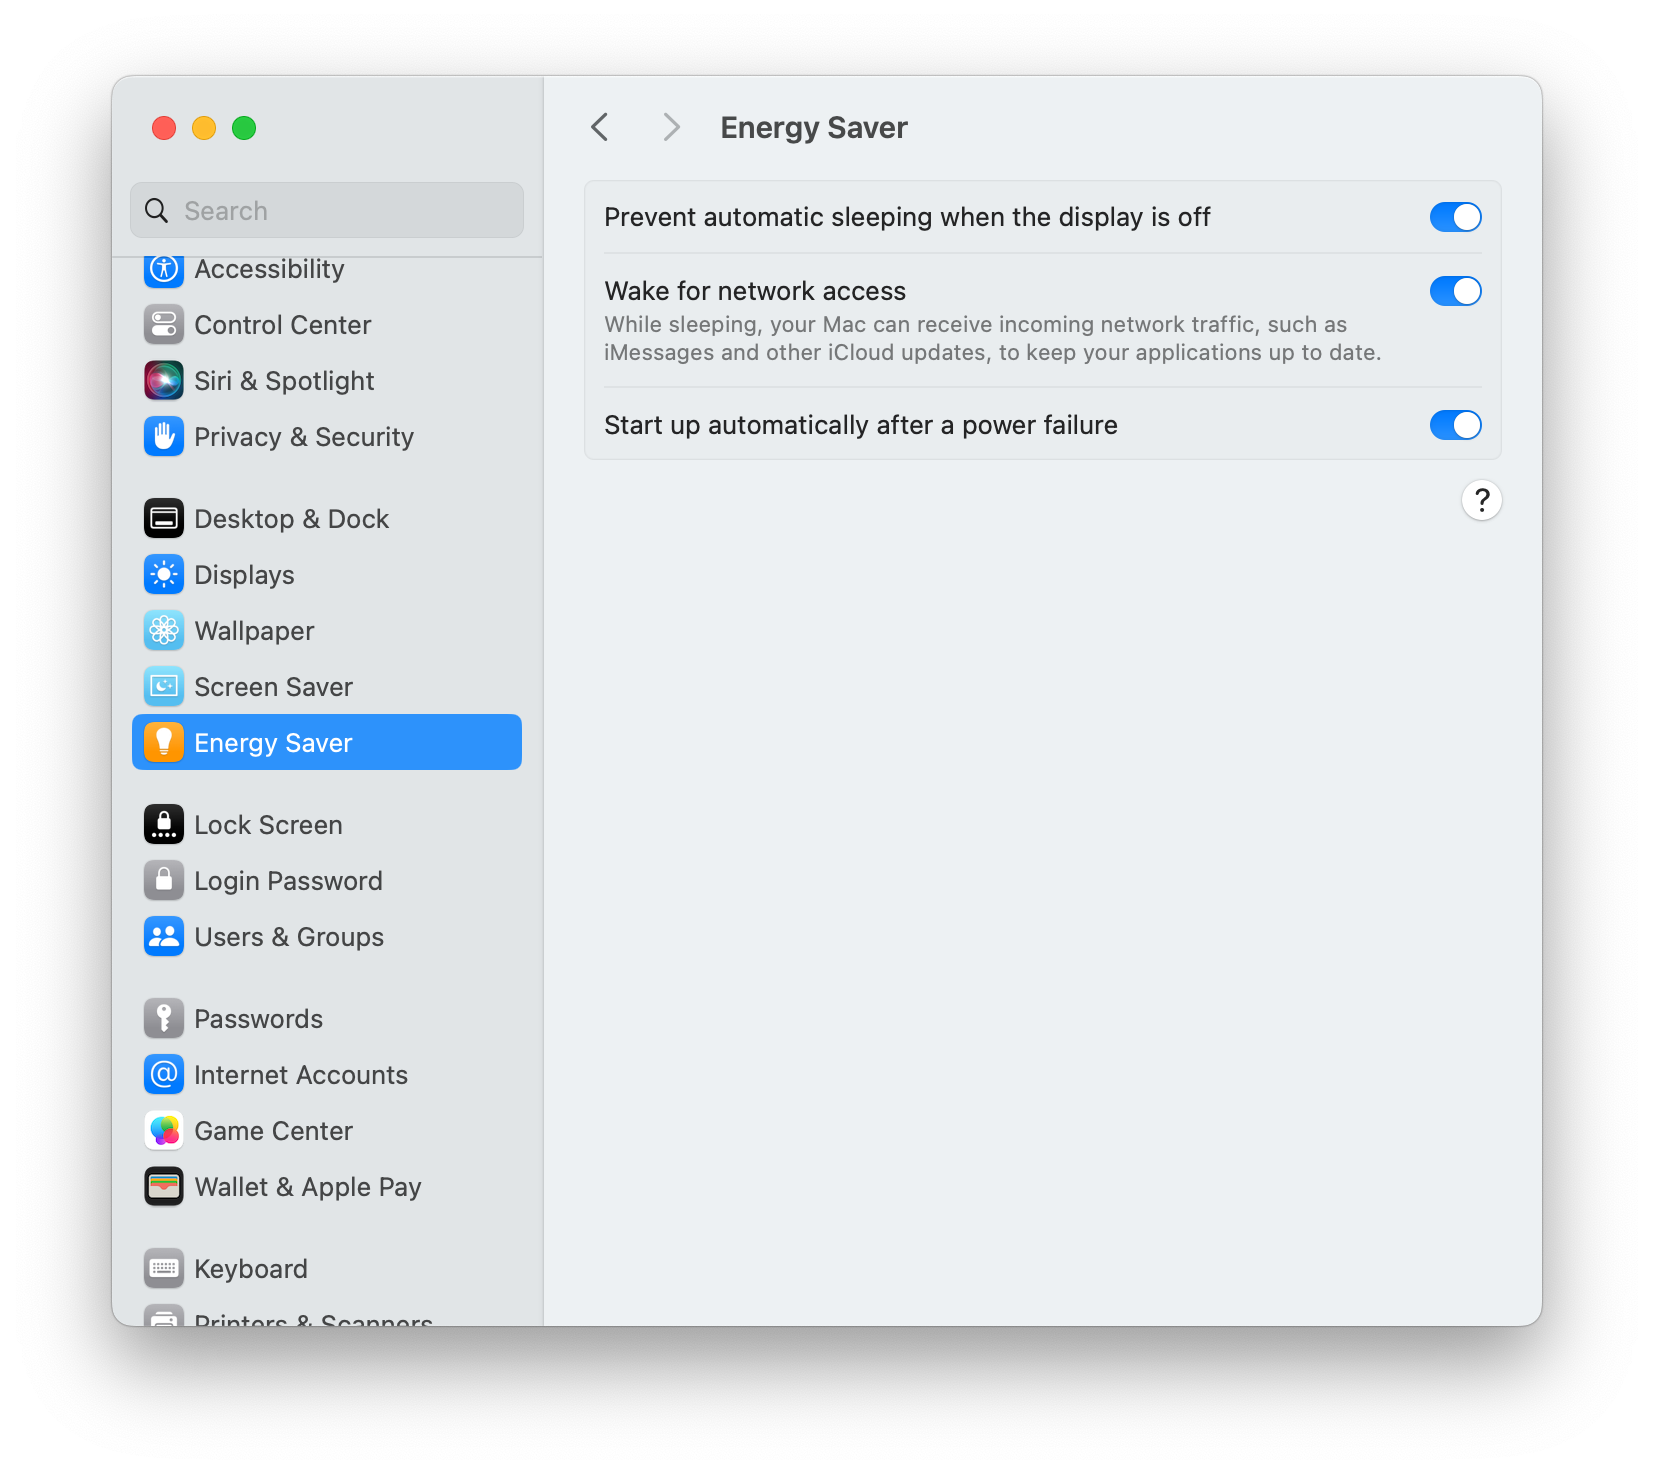
Since the server needs to be on 24/7, set all power options in Lock Screen to Never. The server also needs to auto-login on restart, so in Users & Groups, select the user to auto-login in Automatically log in as. If you need to auto-start after a power failure, enable Start up automatically after a power failure in Energy Saver.
Next, you can shut down the Mac Mini, disconnect the monitor, and place it where you want before powering it on. To access the remote desktop within the LAN, also using macOS Sonoma, open Screen Sharing.app and enter the Mac Mini’s local hostname or address and login password, for example, vnc://yaoxi-stds-mac-mini.local. For Windows or Linux, you can use other VNC clients.
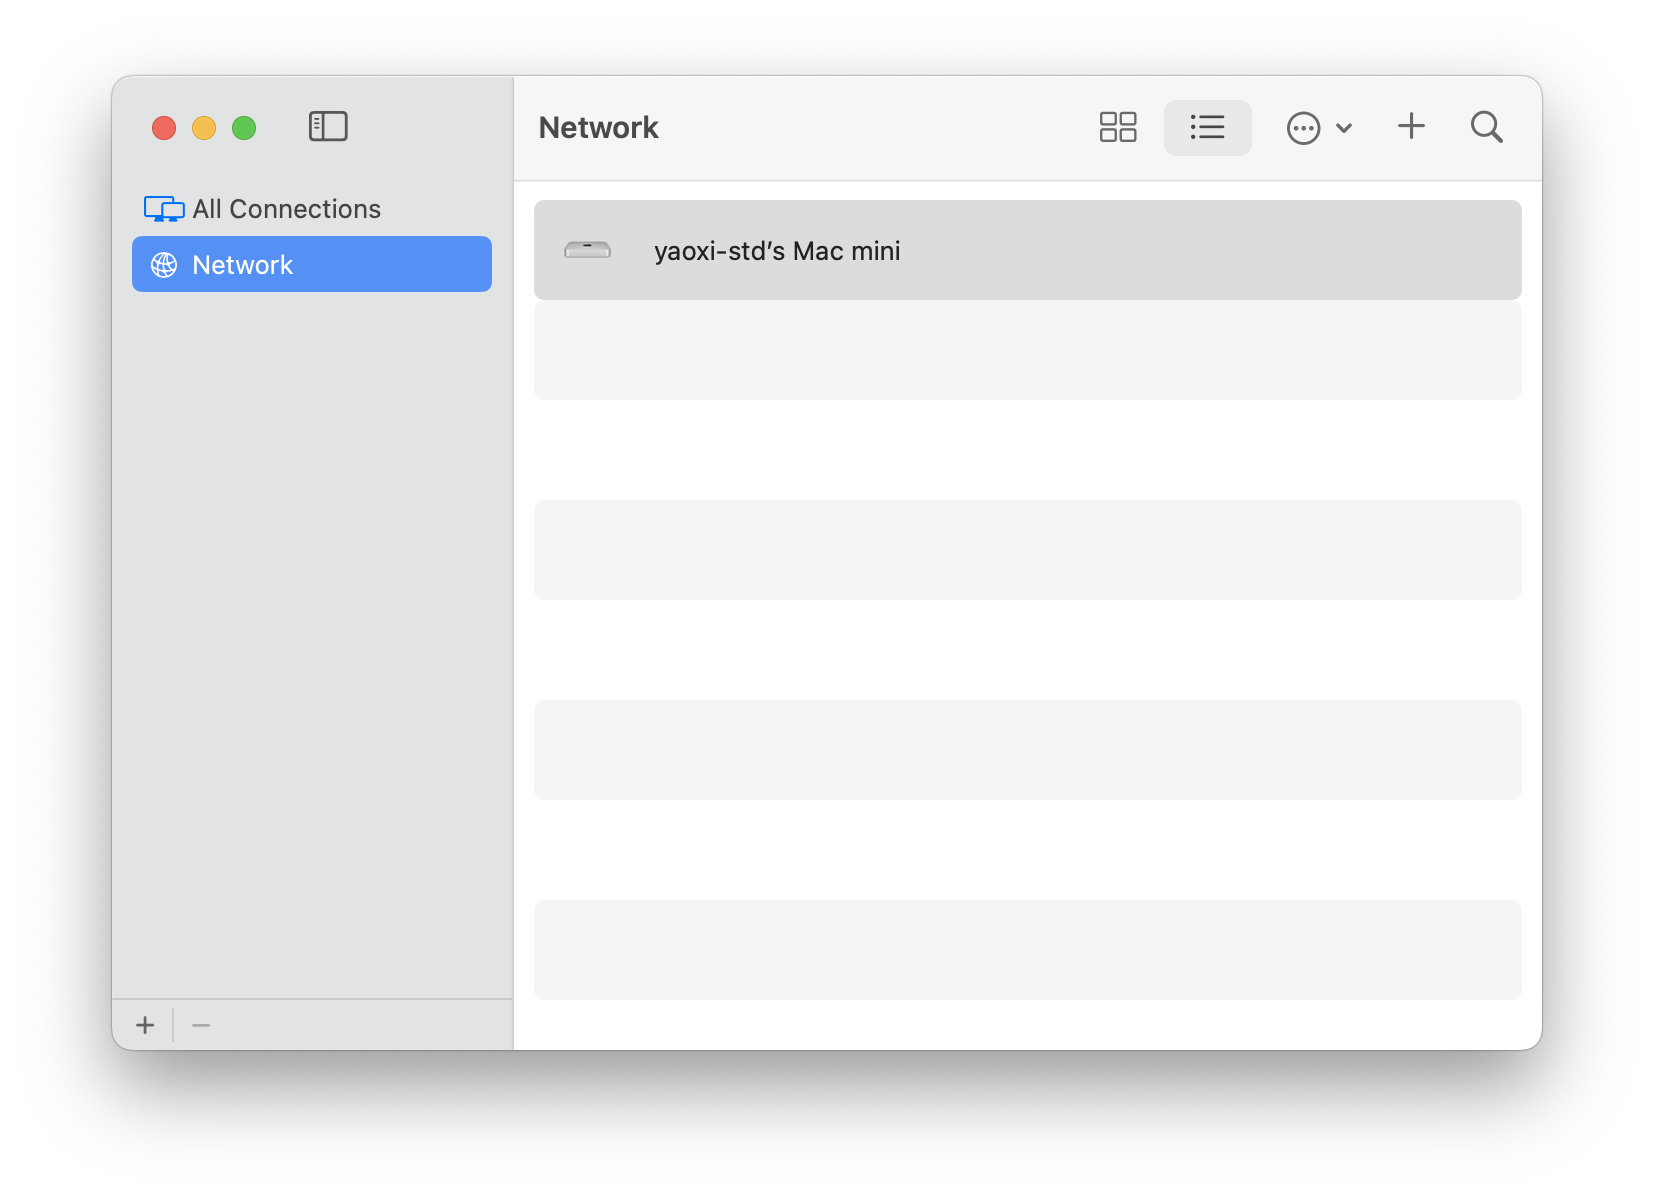
From here, you can choose according to your needs.
Docker
Simply download the macOS version of Docker Desktop.
I initially wanted to try using OrbStack instead of Docker Desktop for performance optimization, but since it’s unofficial, it had some inexplicable issues. For example, I couldn’t pull images using OrbStack on my MacBook Pro.
To properly pull Docker Hub images, you’ll also need to configure a proxy.
I allocated 20GB of memory to Docker on the server, which should be more than enough.
Dial-Up Internet
The following steps are recommended to be performed on the same LAN as the Mac Mini.
macOS supports PPPoE dial-up directly, so connect the Mac Mini and the original router to the optical modem via Ethernet cables and dial separately. This avoids the need to configure port forwarding on the router (unless your router is integrated into the optical modem, in which case port forwarding will be necessary). However, first, ensure the dial-up IP address is not NATed by the ISP.
Setting up dial-up internet is straightforward. In System Settings under Network, click the ... in the bottom right to Add Service, select PPPoE for Interface, and choose the Ethernet port used to connect to the optical modem. Then enter the dial-up account and password in the PPPoE settings; the account is usually a phone number, and you can ask the ISP’s customer service for the password.
Since the Mac Mini is now in the office rather than at home (and even if it were at home, I wouldn’t be able to physically operate it while doing pre-university at THU), it needs to automatically reconnect if the dial-up disconnects (otherwise, it would be useless) and start automatically on boot. So use a script like the one below:
|
|
You can check the $SERVICE_NAME using networksetup -listpppoeservices.
Then you need to set it to start on boot and run in the background by creating a launchd.plist configuration file:
|
|
Then install the service:
|
|
Manually disconnect PPPoE to test. If it reconnects automatically within 30 seconds, it’s successful. You can also test by rebooting the server.
Public Access
China Mobile’s network environment is a piece of shit. It relies on NAT and home broadband is all NATed, so there is no public IP. Therefore, I chose China Telecom and placed the Mac Mini in my parents’ office.

However, China Telecom blocks ports 80 and 443 on home broadband, so without registration, you can’t directly map a domain name to that IP for HTTP(s) access. And the .dev domain I chose cannot be registered according to the regulations (it’s not that I don’t want to), so I had to use some tricks.
The dilemma is that if you use an overseas server for forwarding or internal network penetration, services with high network latency requirements like Minecraft may be affected.
So I came up with a brilliant idea: use two subdomains, one for Cloudflare Tunnel for internal network penetration, ensuring that no port number is needed in the browser address; the other directly resolves via ddns to the dynamic IP generated by the server dial-up since China Telecom does not block the default Minecraft Server port 25565.
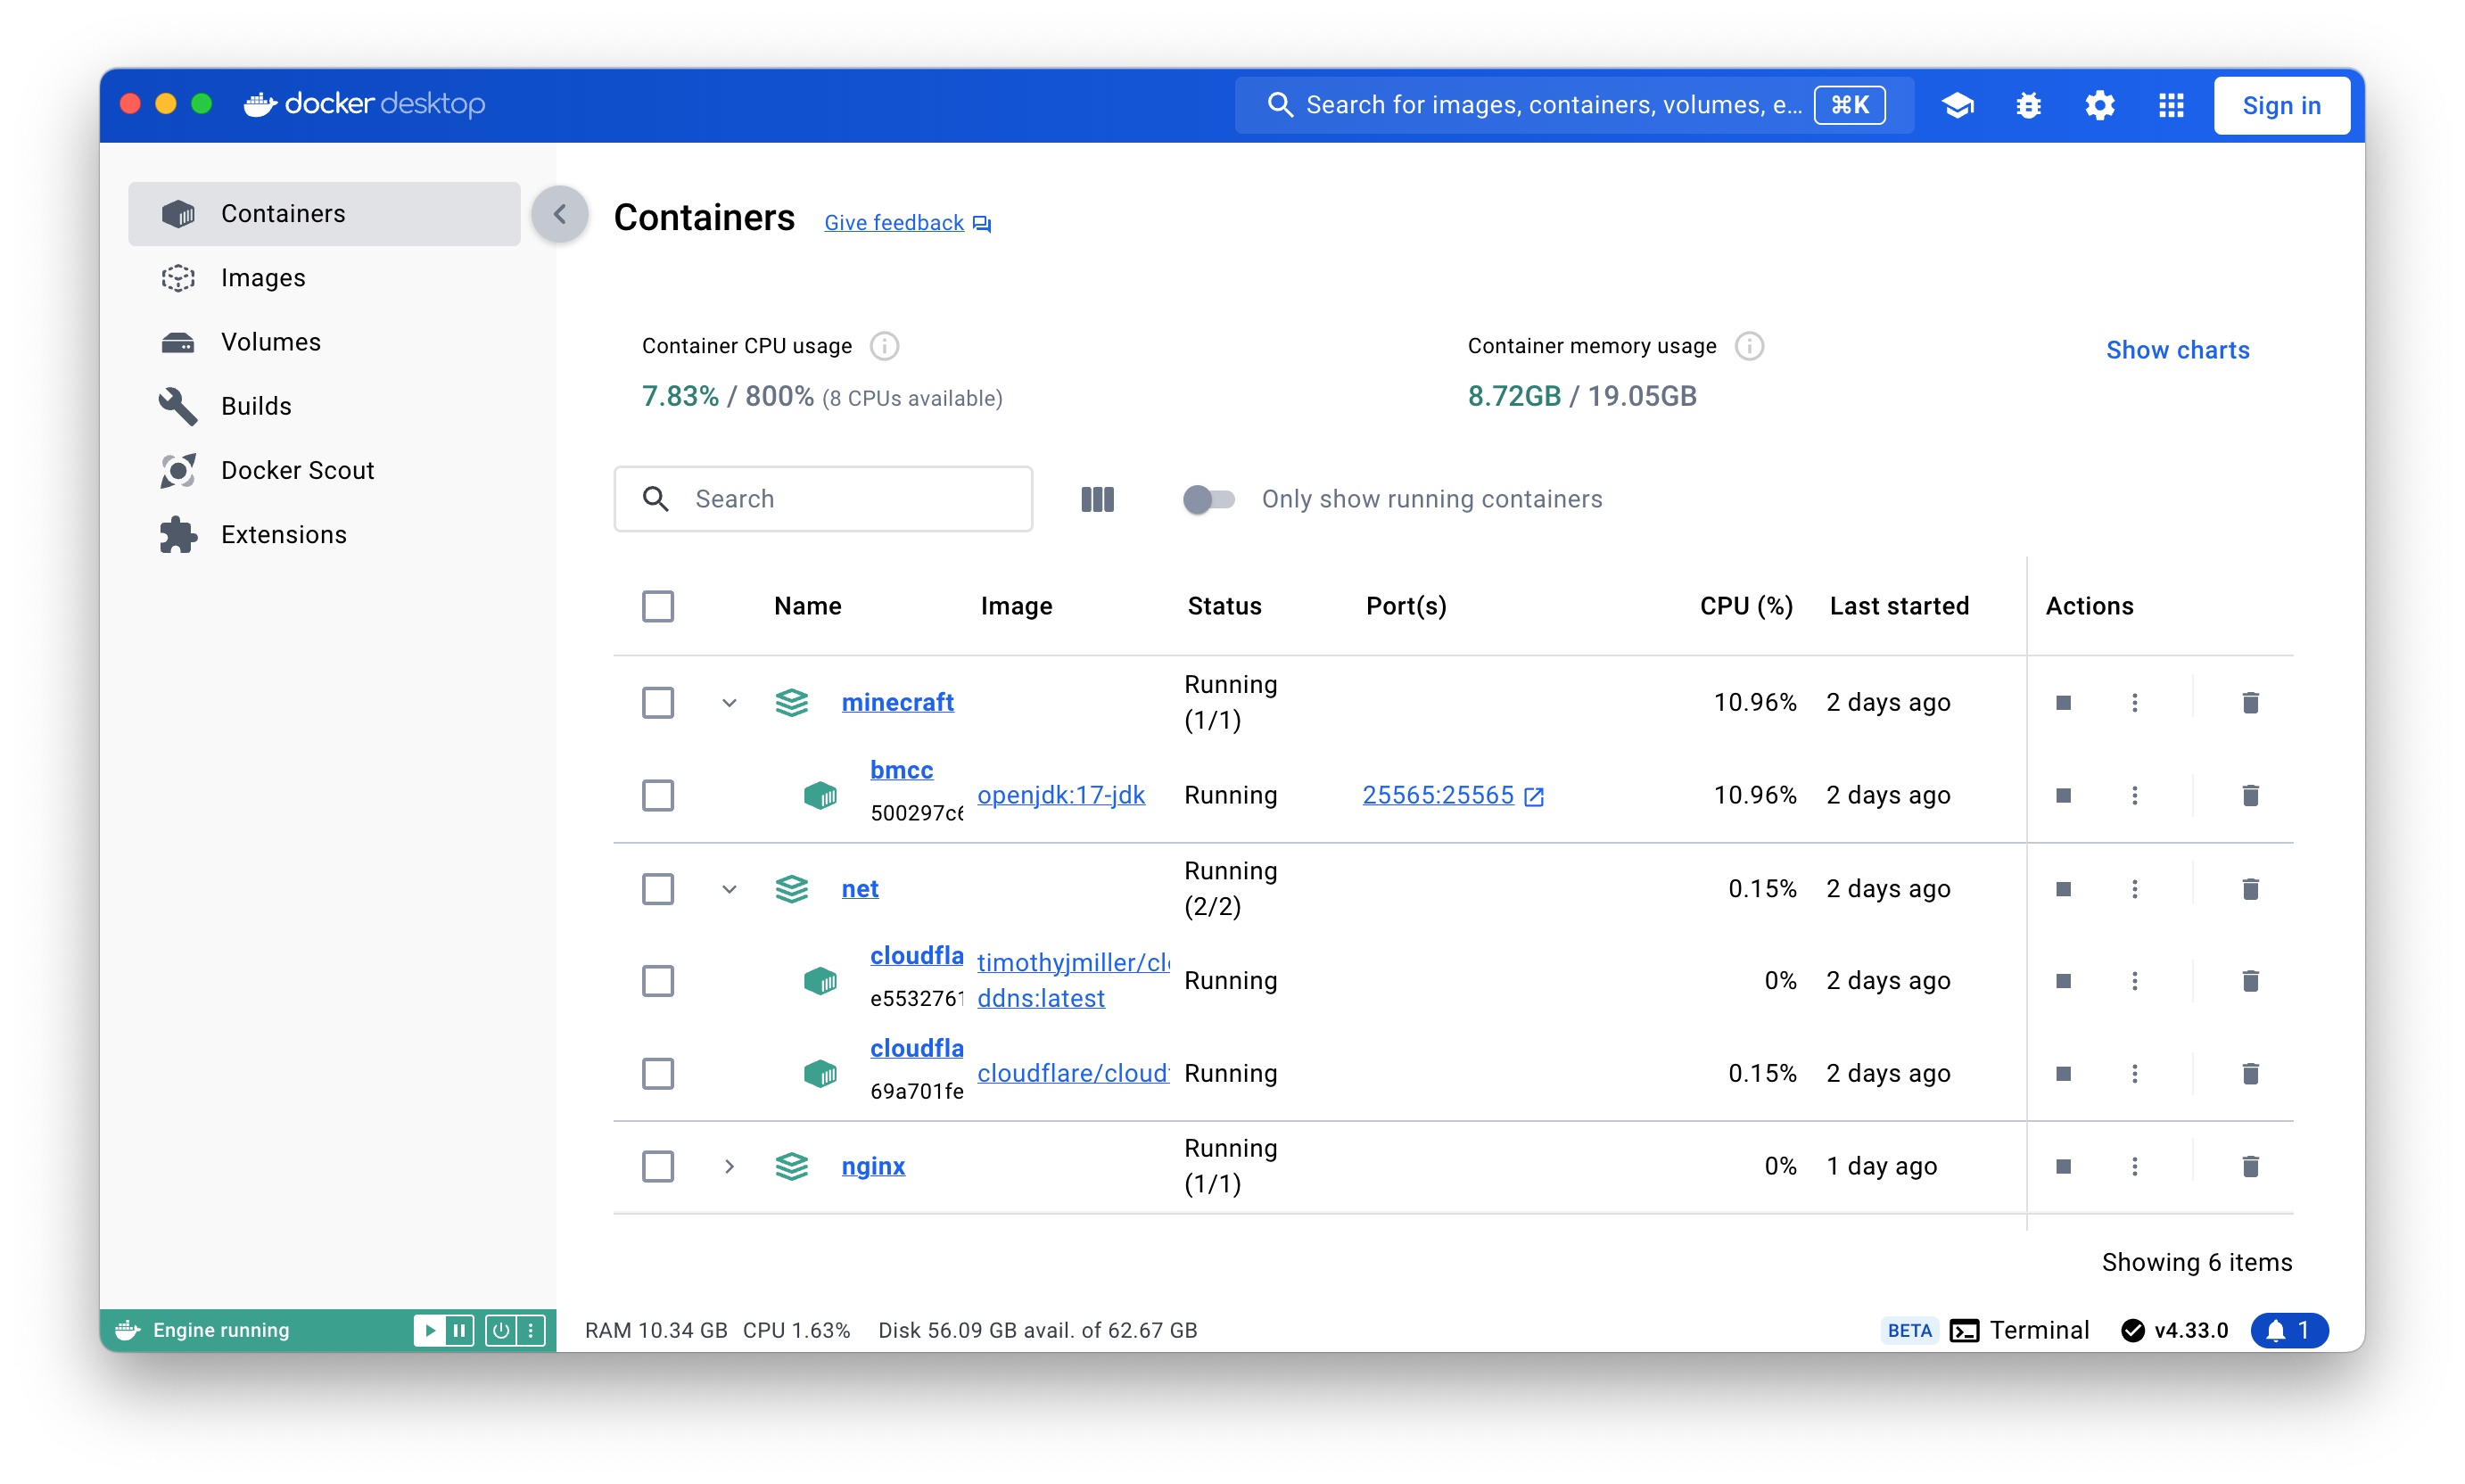
Let’s get started. Adhering to the idea of putting all services in Docker containers, use a docker-compose.yml to set it up:
|
|
Here, cloudflared uses shared-network to prevent the service from exposing ports on the host and instead connect directly to nginx through Docker’s internal network and forward based on domain names to the virtual host. First, create a network named shared-network with docker network create shared-network, which will not need to be recreated after restarting Docker.
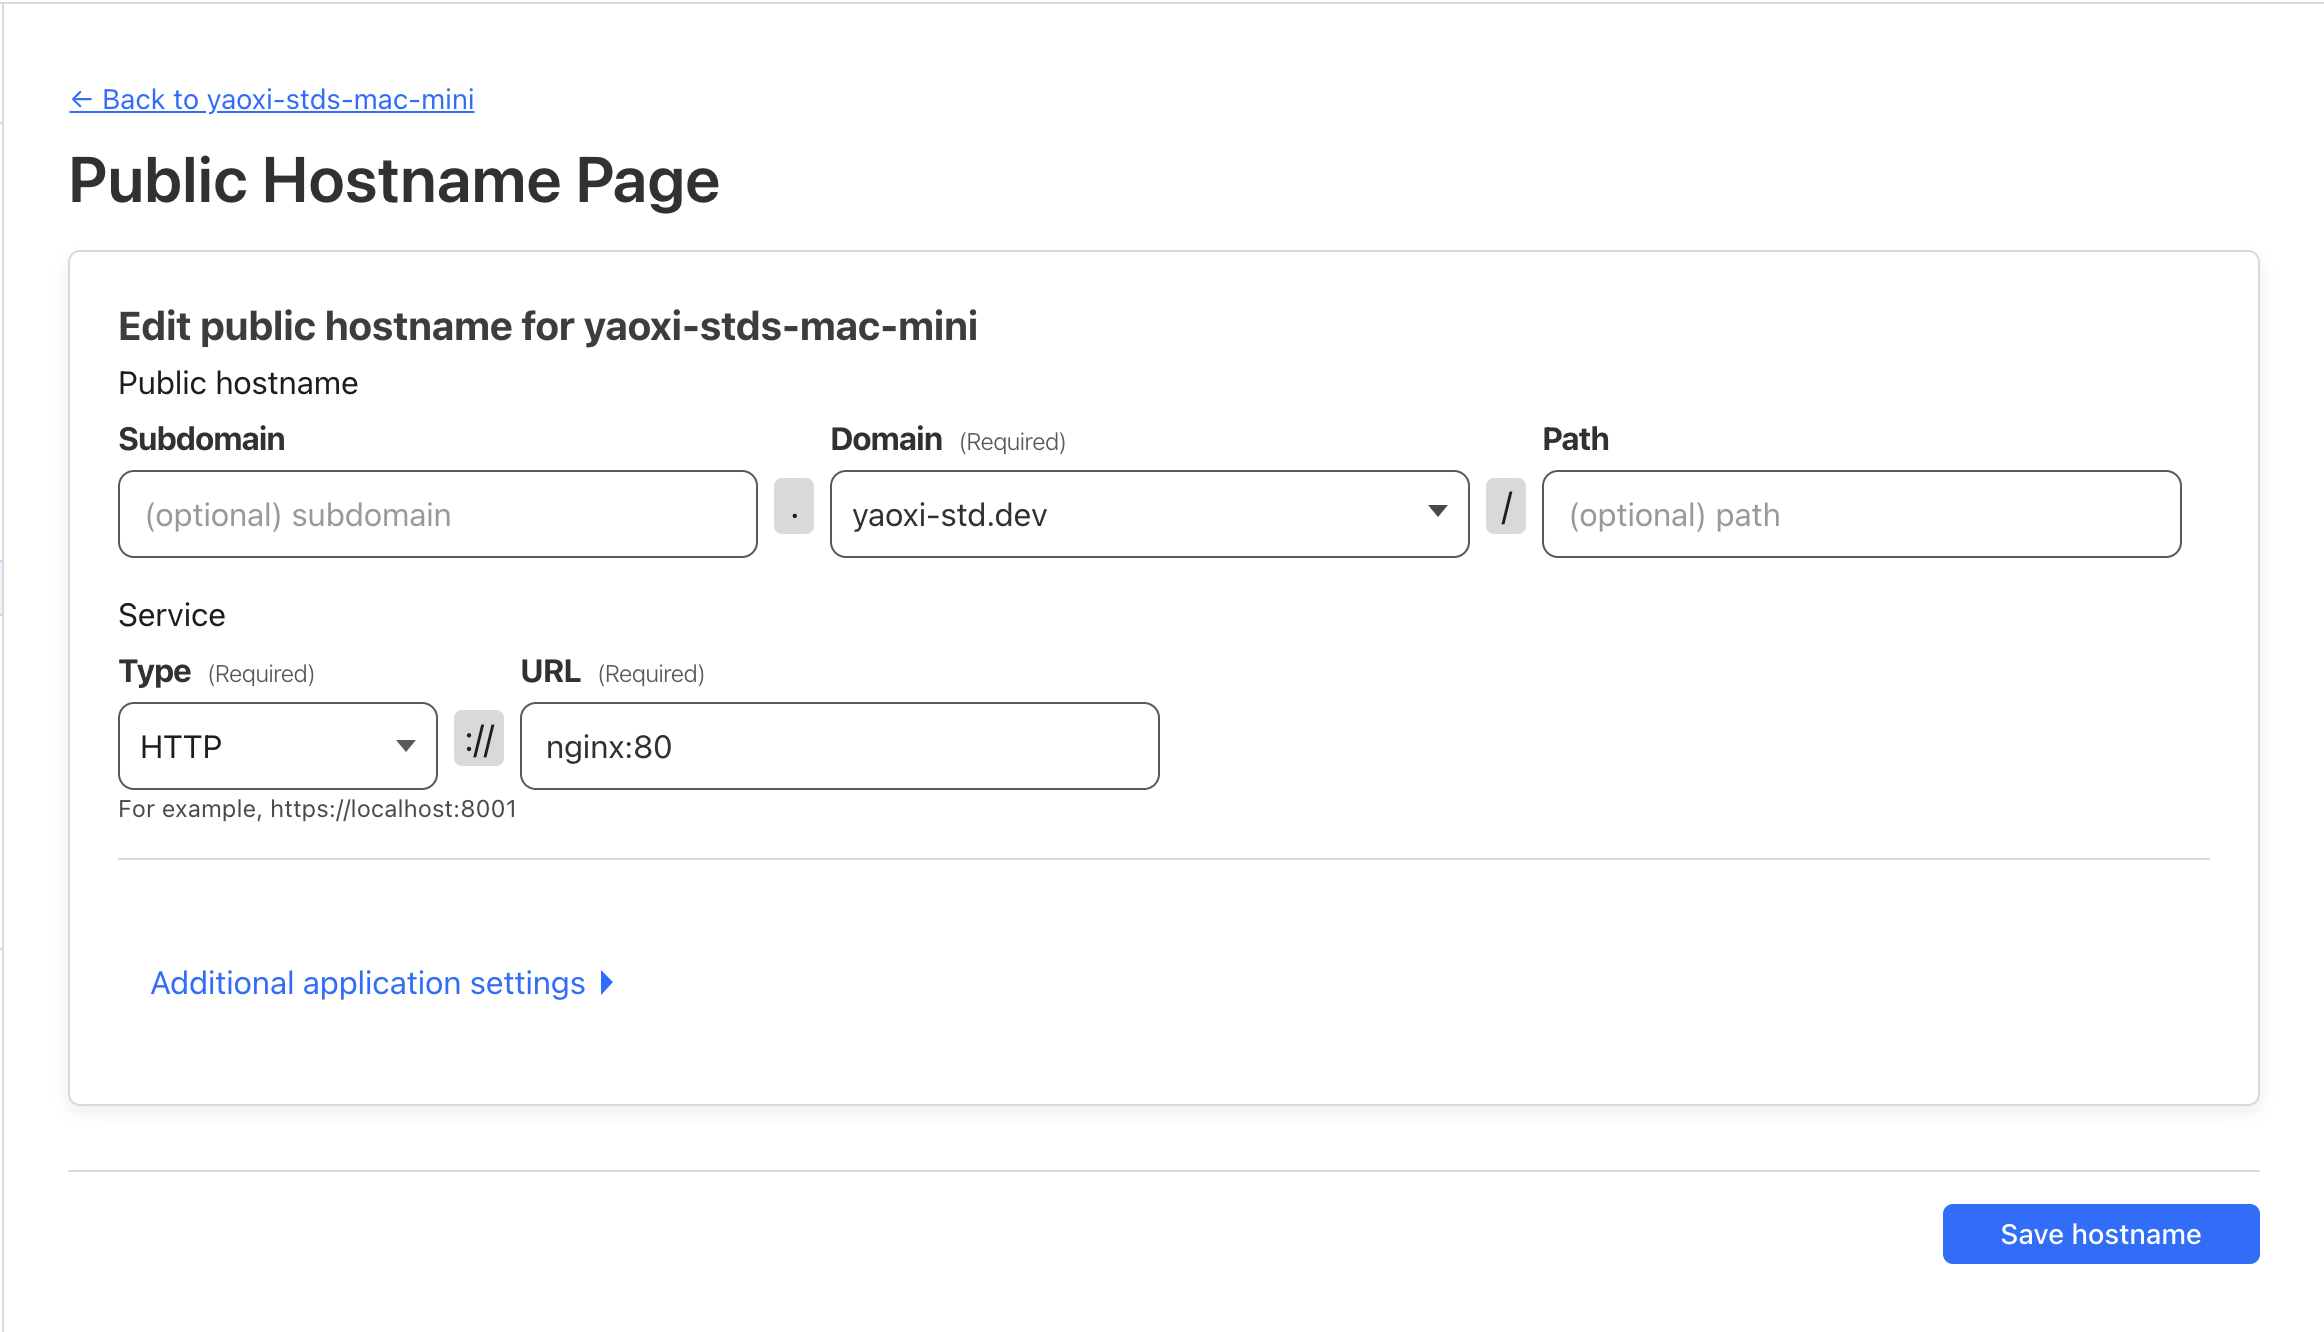
Then configure Cloudflare Tunnel. Note that you should enter nginx:80 instead of localhost:80 because different containers’ internal networks are not the same.
Remember to replace <cloudflare-tunnel-token> and <cloudflare-api-token>.
Note that Docker defaults to using the system proxy. To prevent ddns from getting the proxy server’s IP, add 1.1.1.1 to the bypass list in Docker Desktop.
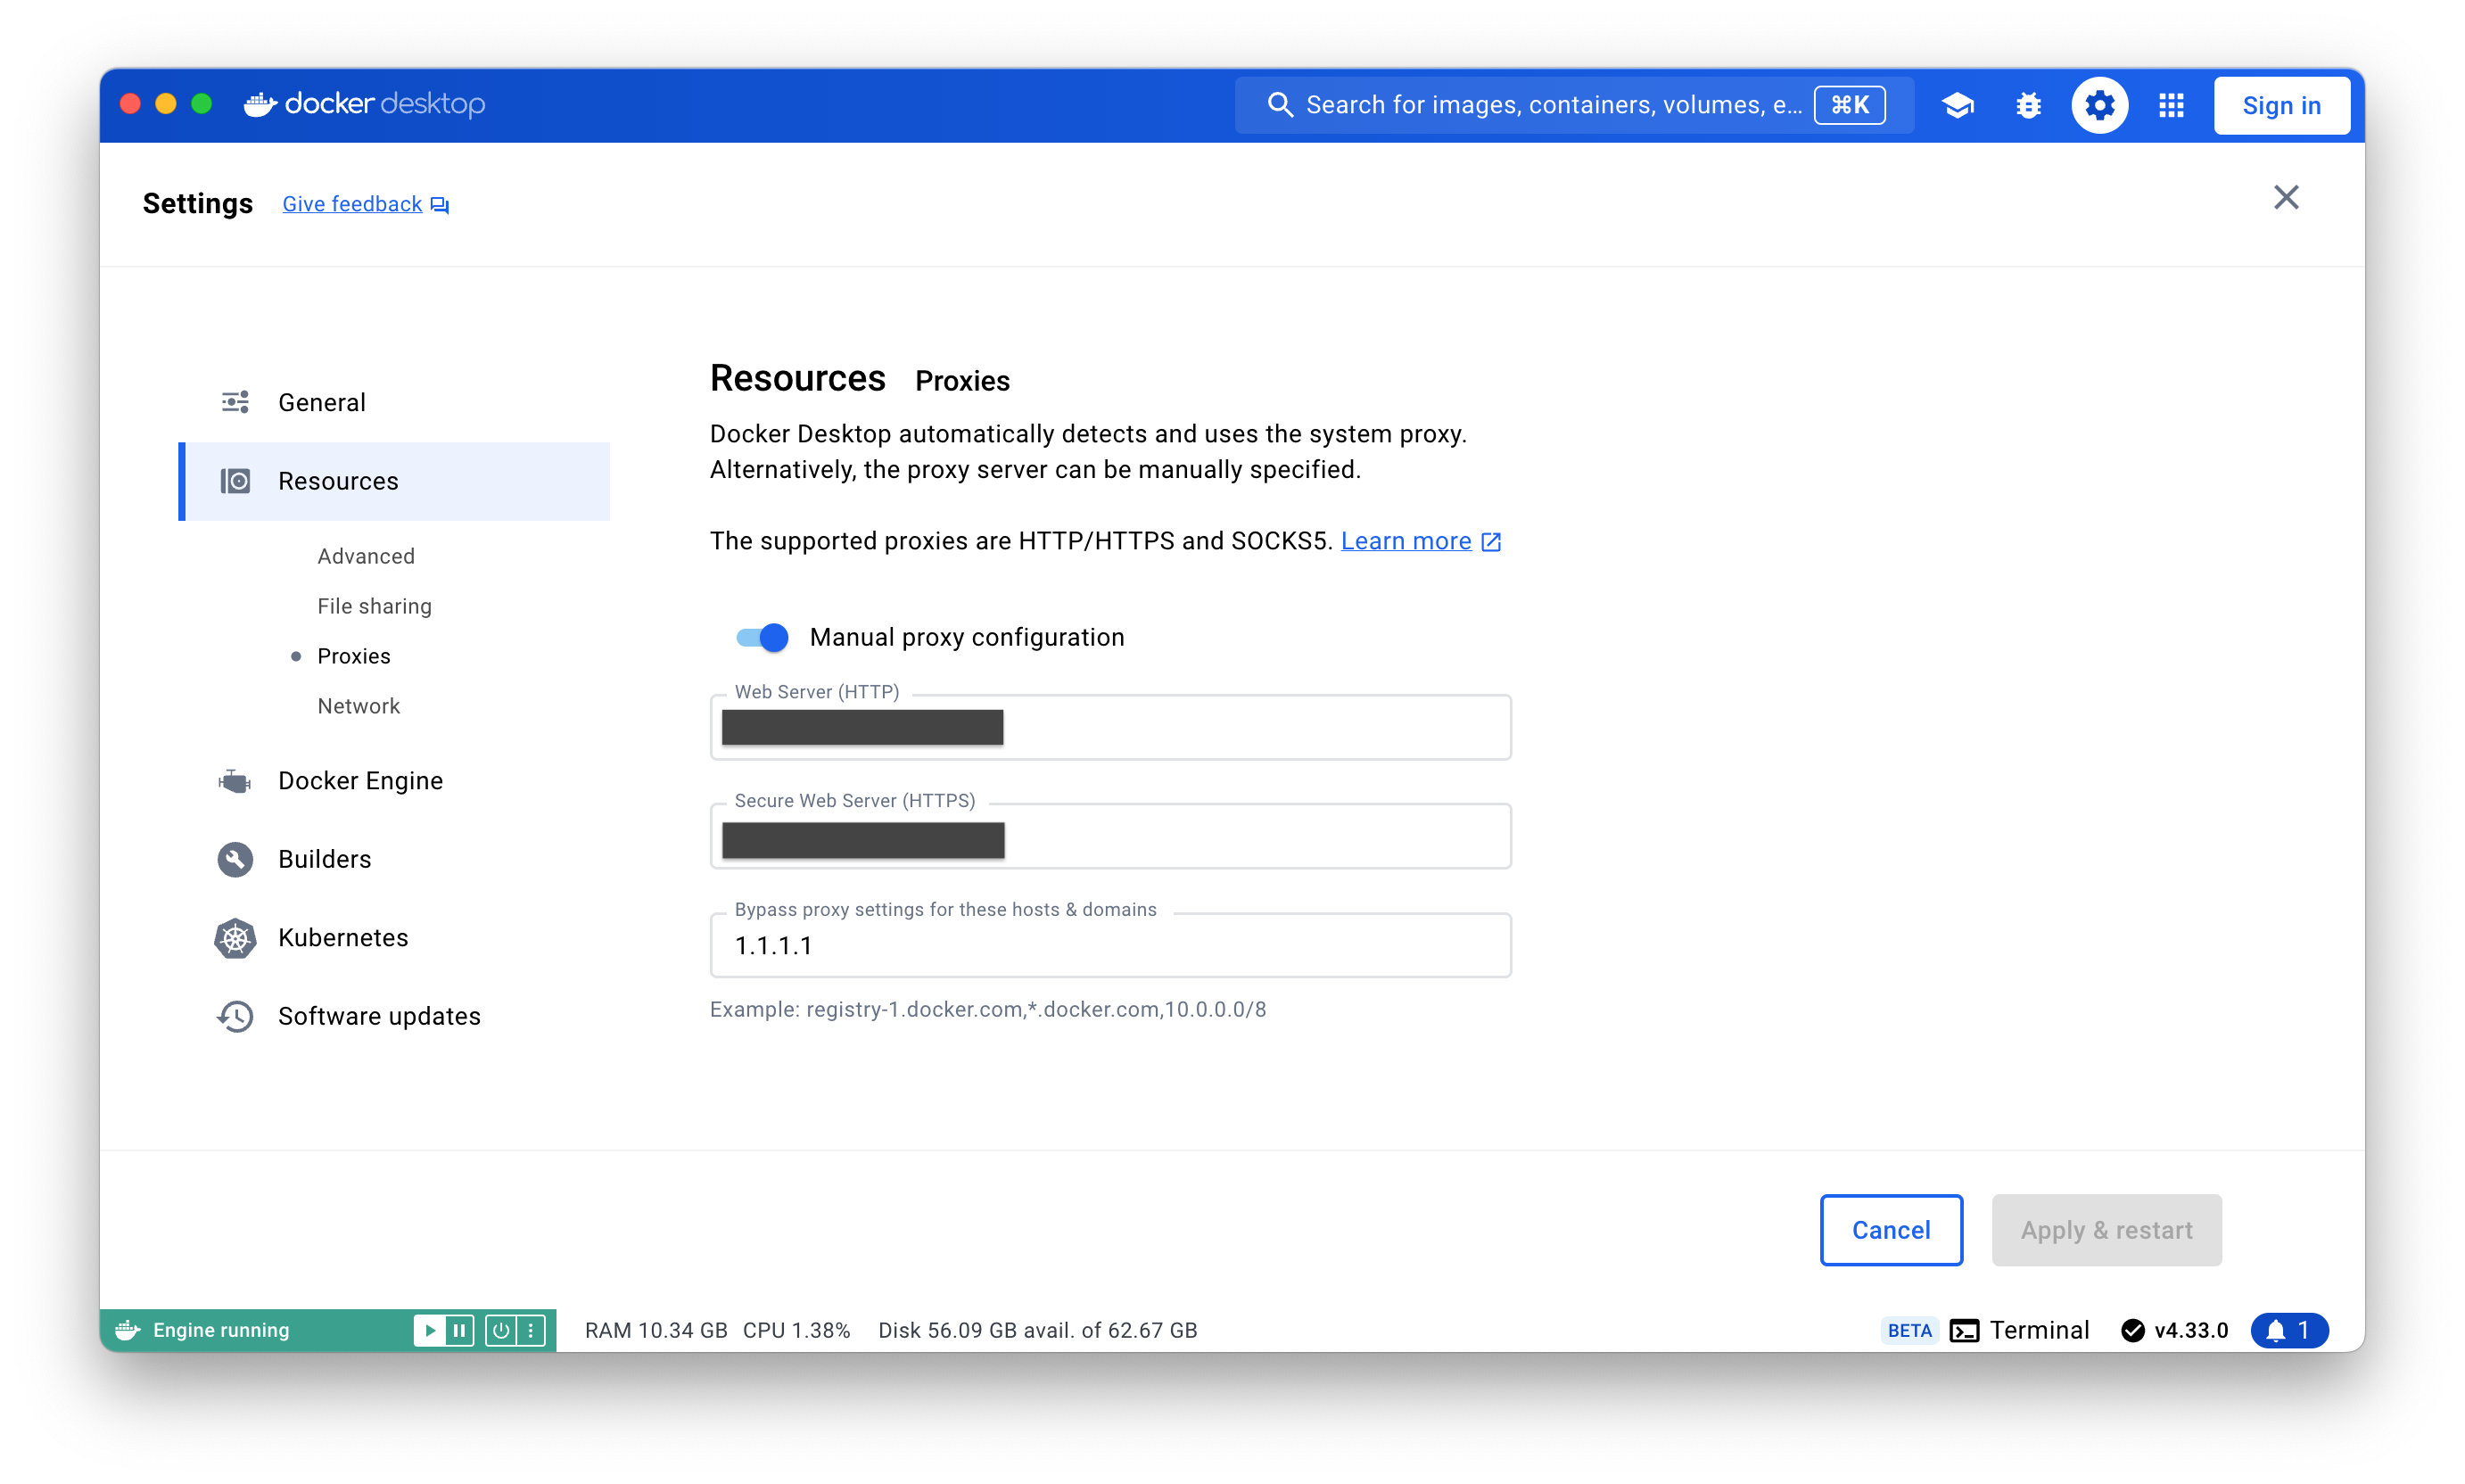
Remember to add Docker Desktop to start on boot, which can be adjusted in System Settings.
Nginx
Install it in a Docker container and connect it to the previously created shared-network.
|
|
Firewall
Since public access is allowed, it’s recommended to enable the firewall. Turn on the built-in macOS firewall in the settings.
Remember to add local services and Docker Desktop to the firewall whitelist.

Remote Desktop
If you use macOS’s built-in Screen Sharing.app to connect to the remote desktop, you’ll find that you cannot change the Mac Mini’s resolution and it defaults to 1080p.
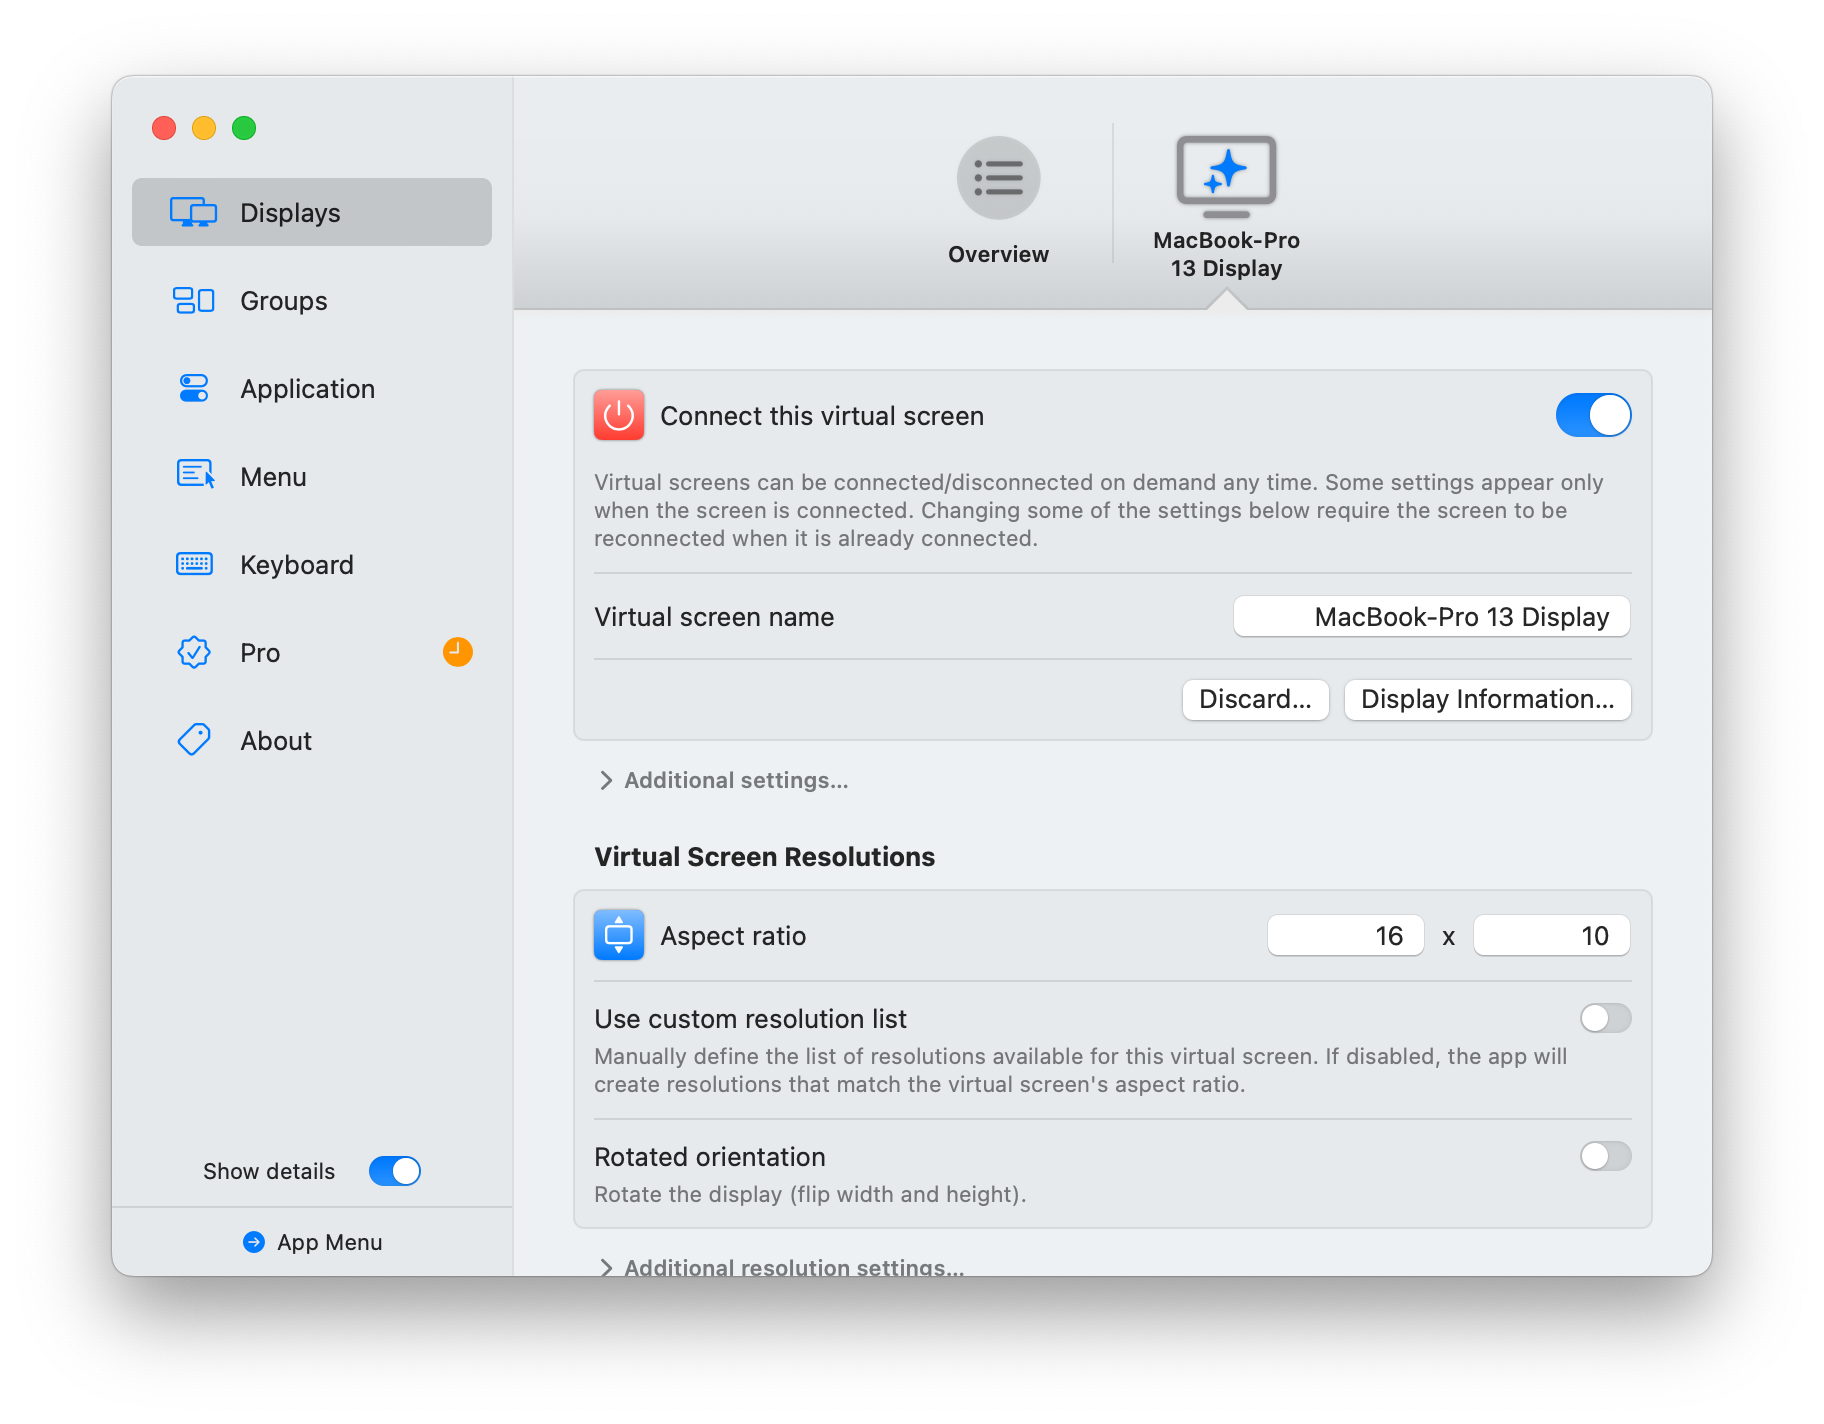
I tried using ScreenResX to adjust the resolution based on other blogs, but the resolution can only be changed when a monitor is connected. When disconnected, it reverts to 1080p. Finally, I found a software called BetterDisplay on Reddit, which creates a virtual display with any resolution, solving the issue.

Rescue Mode
To prevent being unable to SSH directly via the public IP due to ISP issues, consider keeping an SSH tunnel open in Cloudflare Tunnel.
Some places might block port 5900 (I don’t know why), but they usually don’t block port 22. In this case, to access the Mac Mini via VNC, you can use an SSH tunnel:
|
|
This maps port 5900 on the remote host to port 5901 on the local machine, so you can connect to vnc://localhost:5901 in your VNC client.
If there are issues causing ddns to fail, try changing the last digit of the IP address within a certain range. If PPPoE fails, it’s irrecoverable.
Blog
To be updated.
Minecraft Server
To be updated.
Online Judge
To be updated.
Last modified on 2024-08-15